
The following design goals and considerations for the new website were influenced by feedback from the website survey.
- Pages are designed to minimize scrolling.
- A single header and menu are used throughout the site.
- The main site menu has only a few menu links.
- Information is consolidated into a few pages with easy access to related content.
- Clean site pages are designed to focus attention on content and navigation.
- The font is chosen and optimized for accessibility and reading ease.
- Color, position, and size of tabs assist navigation and provide clues to the organizational structure of the page content.
- The responsive layout is optimized for most devices (desktop, laptop, tablet, and mobile).
- The back end is well defined, and organized to help manage site assets (pages, posts, images, and documents).
Post template
All leadership posts use the People Post-1 template.
- Items shown here are edited indirectly.
- The text items are Custom Fields found on the bottom of the Edit editor.
- The image is the Featured Image for the post. This can be set in the Edit or the Elementor editor.
Leadership Title
Person Name
Honorific

Post proper
Bio or story text in actual post. Edited in Edit with Elementor.
Warning: click on the text block already in place to select the text block. Editing the text must be done in the left sidebar.
Text headers selected from the Paragraph menu:
This is a Heading 4 title
This is a Heading 5 title
This is a Heading 6 title
This is a block quote. It is indented on the left and right of the text block. dhd dd hd dhhd. d hhhhhd hdd dhhjjd jdjd djjjjd jjjjd dhyekjjejyeyjjyeje
Generally, people posts do not have additional images in the body. However, if they are needed, images are embedded in the text and their position and size are edited in the Text editor.
Post fields
All fields discussed are required unless otherwise noted.
Post Title Format:
[Leadership Title] – [Person Name] – [Honorific]
Omit the [ ] but keep a space on both sides of the hyphens
Leadership title: e.g. VMFC Chair, Legislative Advocate, etc.
If Honorific is blank, the header used in the post for that field will collapse. This is a desirable effect.
Standard Fields:
- Post title (not displayed)
- Excerpt
- Featured Image
- Categories
- Folders
Custom Fields:
- Leadership Title: e.g. VMFC Chair
- Person Name
- Honorific
The Custom Field Leadership Title will be seen as the post title in most post displays of people.
Places to edit (found in dashboard post list)
- Edit
- Quick Edit
- Edit with Elementor
Edit:
Editor Top
- Post title (not displayed in most post displays) – See Post Title Format above.
Editor Right
- Excerpt
- Featured Image
- Categories
- Folders
Editor Bottom
- Leadership Title: e.g. VMFC Chair
- Person Name
- Honorific
Quick Edit:
- Post title (not displayed in most post displays)
- Slug – generally, leave this blank unless the title has been changed and this field has an entry.
- Date (shown date used to sort posts by date)
- Categories
- Folders
Excerpts
Excerpts should be composed, and preferably be no more than 20 words in length. More than that will play havoc with the formatting of post galleries.
Try to encapsulate the subject or grab your audience.
Procedure
Create a post from a template
- Go to the Posts item in the WP Dashboard.
- Select Templates
- Locate the Leadership Template
- Use the AE Duplicate item to make a copy.
- Find the copied post
- Drag the post into the Leadership folder
Modify the template in Quick Edit
- Click the Quick Edit item
- Change the Title according to the post
- Delete the slug
- In the categories options,
- Select Leadership
- Select the appropriate leader type
- Deselect Hide.
- If this is a CD vice chair, include one of the following tags:
- CD-1
- CD-2
- CD-3
- Select one of the leadership folder. Do not select the Leadership Folder.
- Save the changes.
Modify the appropriate post fields.
- Select Edit
- On the right panel:
- Change/add an excerpt
- Change/add a default image
- Scroll down to see the Custom fields.
- Change the following fields
- Title (leadership role)
- Person Name
- Honorific (leave blank if none).
- Save
- Publish
Scroll to the top and select Edit in Elementor
- Click on the text block
- Edit the text from the sidebar on the left.
- When done, click Publish (top right of the Elementor editor).
Warning: please resist using a mobile device to edit.
Post template
Most article posts use the Veterans News template.
- Items shown here are edited indirectly.
- The date (and time) are set automatically to the date of publication. It can be reset in the Quick Edit editor date field. Be aware that the time determines when it is published as well.
- Title and By Line are Custom Fields found on the bottom of the Edit editor.
- The Featured Image for the post is not displayed here. However, it will be displayed in post lists and galleries and can be set in the Edit or the Elementor editor.

Article or Leadership Title
Date
Post proper
The story text in actual post is edited in Elementor editor.
Warning: click on the text block already in place to select the text block. Editing the text must be done in the left sidebar.
Text headers selected from the Paragraph menu:
This is a Heading 4 title
This is a Heading 5 title
This is a Heading 6 title
This is a block quote. It is indented on the left and right of the text block. dhd dd hd dhhd. d hhhhhd hdd dhhjjd jdjd djjjjd jjjjd dhyekjjejyeyjjyeje
Post images are embedded in the text body and their position and size are edited in the Text editor.
Post fields
All fields discussed are required unless otherwise noted.
Standard Fields:
- Post title (displayed in searches and archives)
- Date
- Excerpt
- Featured Image
- Categories
- Folders
Custom Fields:
- Article Title
- By Line
- Header Image
The Custom Field Article Title will be seen as the post title in most post displays.
The header image is used to identify the article sub category.
Places to edit (found in dashboard post list)
- Edit
- Quick Edit
- Edit with Elementor
Edit:
Editor Top
- Post title (displayed in archive and search post displays).
- It is preferable to keep these relatively brief or they will be mangled on smaller devices and listings.
Editor Right
- Excerpt
- Featured Image
- Categories
- Tags
- Folders
Editor Bottom
Standard for all articles
- Article or Leadership Title: displayed in the post displays.
- By Line
- Header Image
Additional custom fields for Spotlight articles
- Person Name
- Honorific
- Quote
Quick Edit:
- Post title (not displayed in most post displays)
- Slug – generally, leave this blank unless the title has been changed and this field has an entry.
- Date (shown date used to sort posts by date). This can also be the date it will be automatically published.
- Categories
- Folders
- Tags
Excerpts
Excerpts should be composed, and preferably be no more than 20 words in length. More than that will play havoc with the formatting of post galleries.
Try to encapsulate the subject or grab your audience.
Header Images


Procedure
Create a post from a template
- Go to the Posts item in the WP Dashboard.
- Select Templates
- Locate the Article Template (use Spotlight Template for Spotlight articles)
- Use the AE Duplicate item to make a copy.
- Find the copied post
- Drag the post into the appropriate folder (see Article Categories)
Modify the template in Quick Edit
- Click the Quick Edit item
- Change the Title according to the post
- Delete the slug
- In the categories options,
- Select the appropriate article type
- Deselect Hide.
- Check the folder and make sure it is correct.
- Save the changes.
Modify the appropriate post fields.
- Select Edit
- On the right panel:
- Change/add an excerpt
- Change/add a default image
- Scroll down to see the Custom fields.
- Change the following fields
- Title (you can copy the title used as the post title).
- By Line.
- Select the appropriate header image.
- For Spotlight articles, include
- Person Name
- Honorific
- Quote
- Save
- Publish
Scroll to the top and select Edit in Elementor
- Click on the text block
- Edit the text from the sidebar on the left.
- When done, click Publish (top right of the Elementor editor).
Article Categories
News
- Washington Report
- New Mexico Report
Member News
- Letter from the Chair
- Take Action Now
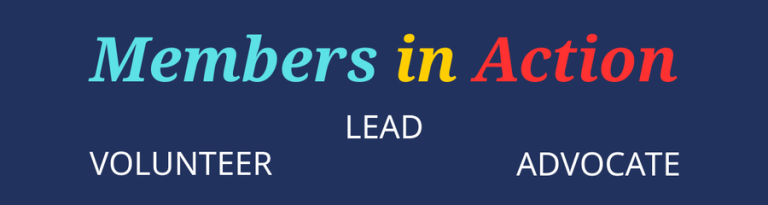
- Members in Action
- Spotlight
Veterans Affairs
- Veterans News
Spotlight posts are nearly identical to Article posts. Use Article Post guidelins and process for Spotlight articles.
The difference is that Spotlight posts use a few additional custom fields:
- Person Name
- Honorific
- Quote

Article or Leadership Title
Person Name
Honorific
A Quote
Bio or story text in actual post.
Standard Fields:
- Post title (not displayed)
- Excerpt
- Featured Image
Custom Fields:
- Article Title: ???
- Person Name
- Honorific
- Quote
Post Title
[Person Name] – [Honorific] – [Quote]
If the quote is long, it should be truncated here in the title.
Intro
Good Luck!
Parameters
Event Title
The title of the event should be very short (ca. 5-10 words). Smaller devices (mobile phones) will display very few words in the calendar view.
Event Description Field
Your description will contain the following general types of information:
- Description of the event (ca. 10-30 words). The event description should be short. More information should be provided through linked sources: website or social media.
- Additional date and time specifications that go beyond date information entered in the date portion of the form.
- Location: physical address, zoom link, RSVP link, map link.
- Contact information and relevant links to more information: e.g., email links, website and social media links.
Suggested Description format
Brief description
- When: [date & time]
- Where: [location
- Contact: [details of who and how to contact someone]
Etc
Date and Time Information
See the Date Entry tabs for options and details.
Event Type
Select the most relevant from the pull-down menu. If you cannot find a match, choose General and make a suggestion in the comments field. If we see several of these, we will add it to the list.
Images
See the Image Specifications for details.
Single Date Entries
Single Date Event
Use Single Date Event for meetings, openings, campaign launches, etc.
Example: Meet & Greet at the peak of Qomolungma from 6:00 pm to 8:00 pm on 4/1/2027.
- Enter the Start Date. The End Date should automatically update appropriately, but make sure. Also, if you change the Start Date, make sure the End Date is updated.
- Times:
- For an all day event, select the All Day Event option (found just below the Start Date).
- Otherwise, set a start and end time. Use the scroll wheel to manipulate the times list. You can use the scroll bars or your mouse, but the scroll wheel works best.
If the event is not an all day event, you must include a start and end time. You can hide these from the front end by selecting the appropriate options.
Multi-Date Entries
Multi-day Event
Use Multi-day Event for a weekend convention, retreat, or an event that covers a range of consecutive days. This is different from Repeated Events that span a range of dates that may or may not be contiguous. This option treats the date span as a single event. Dates between the start date & time and the end date & time are marked as all day events.
Make sure that the End Date is the last date of the event series. Multi-day events are the only events in which the End Date differs from the Start Date.
Do not select the All Day Event option. Instead:
- The Start Time is associated with the Start Date.
- The End Time is associated with the End Date.
Example: a six day retreat from Jan 5 at 5 pm, through Jan 10 at 8 am. All days between are part of the event.
Repeated Date Entries
Repeated Events
The Repeated Events option is used for daily, weekly, monthly, yearly, or custom dates that may or may not be contiguous. This option creates individual events for each occurrence.
Examples:
- Saturday or weekend canvassing until an election
- Thursday meeting every two weeks
- Monthly or quarterly meetings.
- Individual dates that do not follow an easily defined pattern.
Set the Date and Time to the first occurrence of the repeated series. The End Date MUST be the same as the Start Date.
In the panel to the left of the Date and Time fields, select Repeat, then Repeat this event.
The repeat options are fairly intuitive and depend on your selections. Be aware that EventPrime will use default settings that you must change.
Under Event Titles for Repeating Events
- Select the Auto Generate Titles option (which appends specific info to each event title in the series),
- then select the Suffix option.
- Consider using the date suffix.
Details of repeat events, especially Title and Description, can be individually altered.
Weekend canvassing for several weeks
If the times differ for the two days (e.g. Sat. & Sun.),
- Enter the times for one of them and include time information in the description.
- Alternatively, use two separate event submissions, one for each day. In this case, upload the event image once and include a note in the Supplementary form to use the same image.
Example:
Canvassing on weekends both Saturday and Sunday
- Start Date = 1st Saturday for canvassing
- Fill in Start and End time of one of the days
- Repeat Every 1 Week(s)
- Repeat on: select Sunday and Saturday
- End Date by (select one)
- Specify the last date of repeated events
- Additional occurrences (i.e. number of days not including the 1st one)
Images
Best Practices
Logos, centered head shots, and simple graphics work best.- Images should be composed so that left and right margins do not matter if the wide image is cropped into a square.
- Text-dense fliers often look distorted on the calendar. In many views, the text will be cut off or unreadable.
- Text should be kept to a bare minimum (0 – 5 words) with high foreground/background contrast.
- Date, time, and location information on the image will likely be cut off and may be too small to see clearly, especially on mobile devices.
- Website URLs and email addresses on images are not clickable. Use the Event Description field to convey event information, not the image.
Images
Image File Types
Images must be in one of the following file formats:- jpg or jpeg (preferred)
- png
- gif
Image Size
To make your event submission look its best, use an approximate width to height pixel ratio: 3:2. Square images will also work but may be cropped. Portrait shaped (poster) images will be cropped to 1:1 or 3:2 landscape. It is best to create an image that is optimized for the calendar display. Examples (width x height):- 600 x 400
- 1200 x 800
- 1280 x 853
- 1080 x 1080
File size
File size 125K to 750K. Use jpeg compression to reduce the file size. The images below are less than 200k.
Additional Parameters
Parameters found in the rightmost panel:
- Event Type: select the most relevant.
- Ignore Venues and Organizers.
- Select one or more folders for the event.
- Choose a default image.